RADAR Set-up and Configuration
RADAR (DNAV - bi) allows you to quickly view, analyze, and manipulate the data contained in your system. You can instantly analyze the profitability of your products, customers, salespeople, and locations.
SPEC 5924 - Standardize End User ID/Password management across ALL web platforms
RADAR Control User Setting (RDR 2)
RADAR User Settings - RDR 1
These options let you grant or deny access to the applications contained in RADAR. Access to RADAR options can be set at a global or user level.
Find the user and enter a "U" in their Opt field.
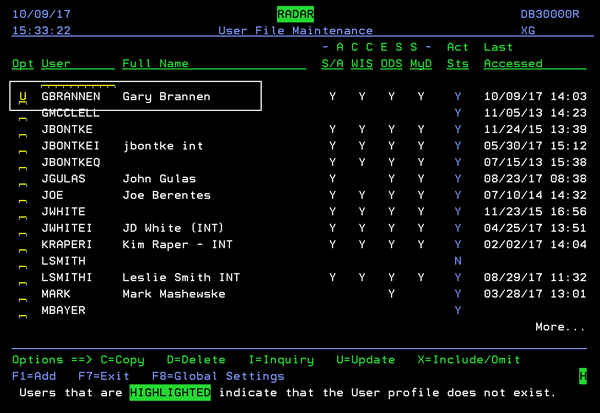
Press Enter to access the first of seven settings screens.
- Screens 1 and 2 - Grant Access to the RADAR functionality. If a user is denied access to an application, its image is grayed out on the RADAR screen. The default is for the settings to be activated ("Y").
- Screen 3- Group "X" Limits - This screen includes "limit" settings. The first group of settings allow you to limit the selections available under the Group By X drop down. Enter a "Y" to allow the option to be displayed and/or selected in the drop down box. These settings display under the Group By X drop down.
- Screen 4 - Optional Filters - The Optional Filters are located on the right hand side of the RADAR screen.
- Screen 5 - Ranking Periods - The Ranking Periods are accessed as one of the Data Types.
- Screen 6 - Comparison Periods - The Comparison Periods are accessed as one of the Data Types.
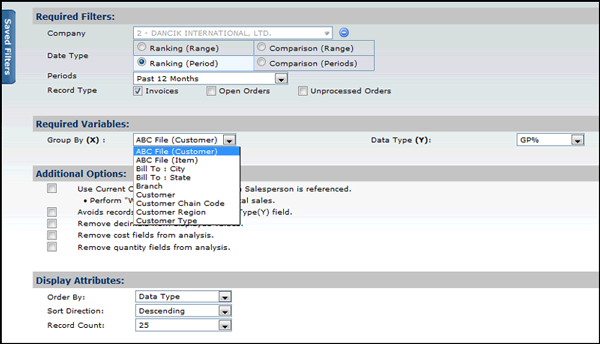
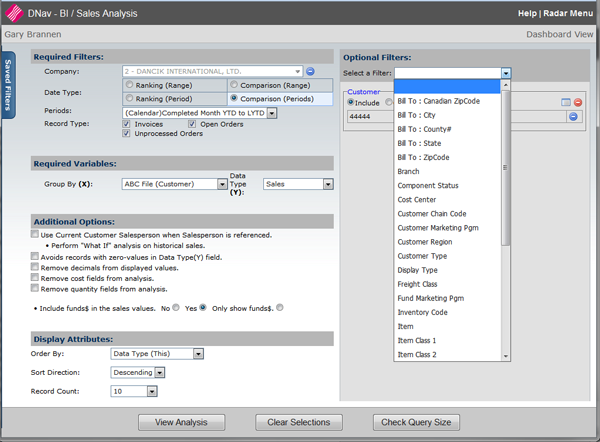
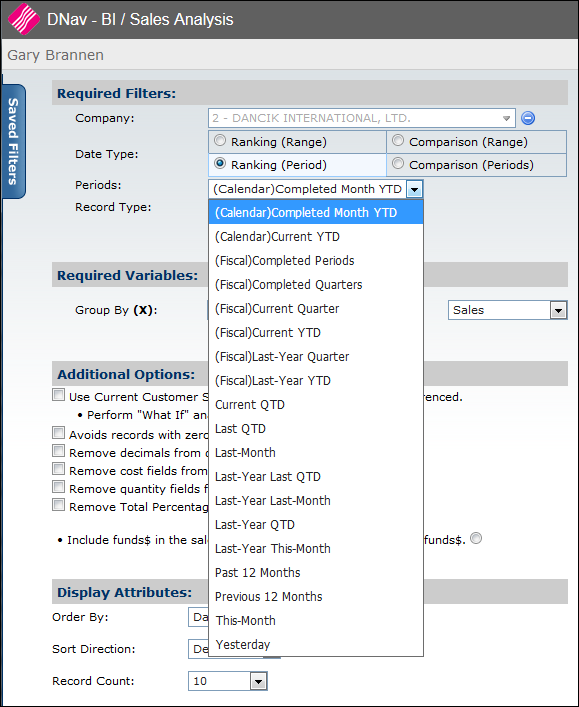
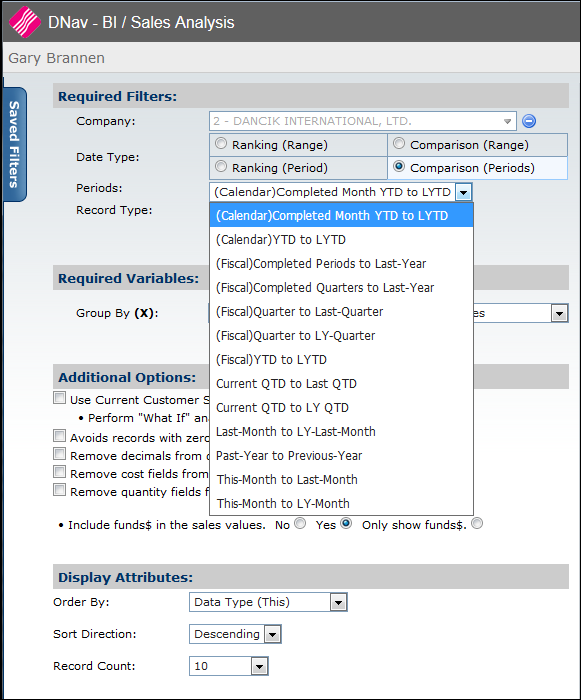
Screen 7 - Cost Hidden Fields - Allows a user to see specific cost fields; even if they are not allowed to see cost.
Global Access
On the User Listing screen, press F8 = Global Settings.
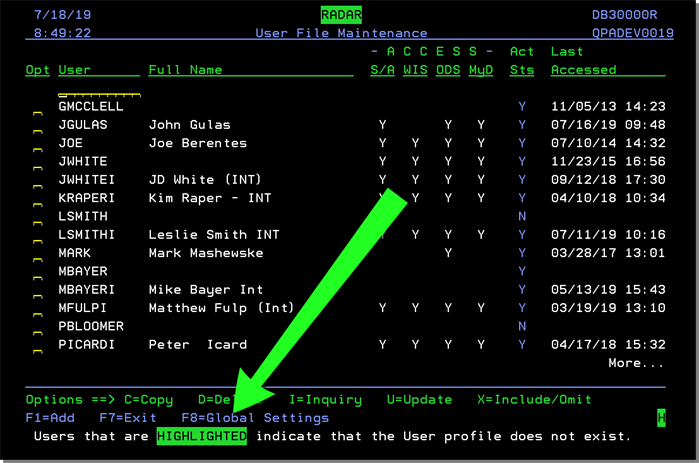
The first of seven setting screen appears.
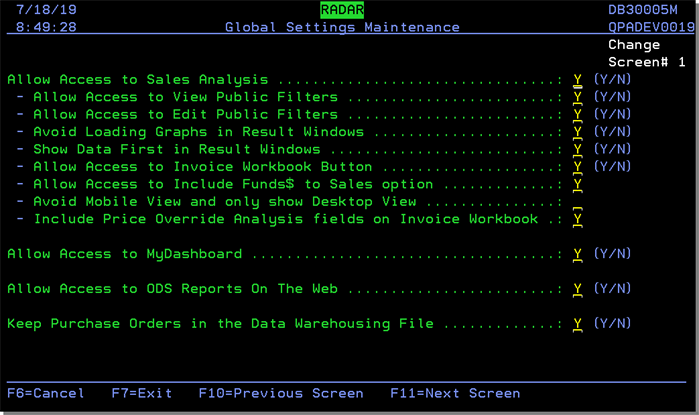
Work through the seven screens of settings to set the global settings.
The default is for the settings to be activated (Y).
RADAR Control User Setting (RDR 2)
This user administration program combines all of the user-related settings into one place. It combines all of the user defaults, security fields, and parameters related to any application, including web applications like RADAR.
When this option is selected, the screen that appears list all the current and inactive (highlighted) users on your system.
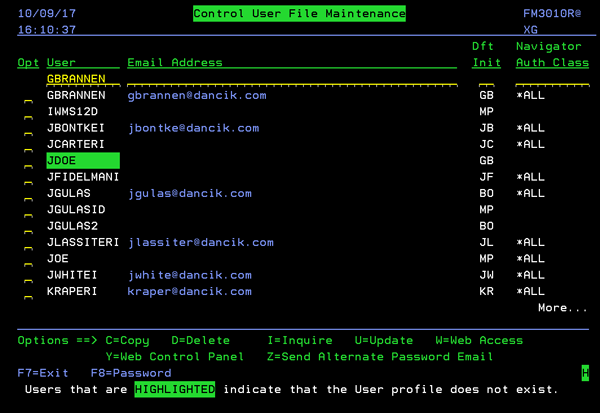
Updating a RADAR Record (Option U)
RADAR Web Control Panel (Option Y)
Updating a RADAR Record (Option U)
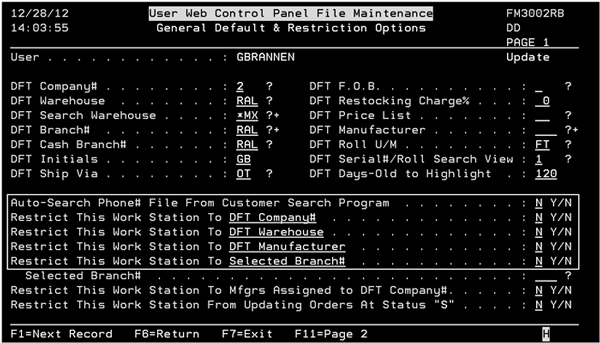
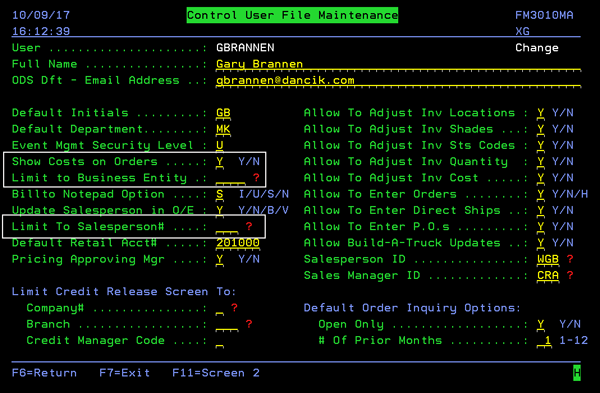
Use this option, along with a high level password to make changes to an existing control panel. When a U is entered into an operators Opt field, and Enter is pressed the first screen of the Control Panel Settings appears.
The fields most used by RADAR are circled.
| Field | Description |
| Show Costs on Orders |
Use this parameter to establish, by user, who can view product costs in certain programs. Enter Y to allow costs to show on Order Entry. Optionally, enter N to indicate that costs or gross profit statistics should not be displayed to this user on Order Entry. This option affects the Order Entry, Order Change, Order Inquiry, and Invoice Inquiry Screens. Furthermore, prices on POs and transfers will not display while performing searches. If you enter an N in this field and the Cost field, the user is restricted to only running X by Y reports in customer version. |
| Limit to Business Entity |
Business Entities are groupings of companies, branches, and/or cost centers. For example, you can group all your branches in one region into a business entity. Or you can create a business entity by product such as grouping ceramic tile and wood products. Entering a Business Entity code in the Limit to Business Entity field causes that business entity code to appear in any application that has the business entity parameter. This currently includes X by Y reports. If you leave the Limit to Business Entity field blank, the user has access to all the business entity records. |
| Limit To Salesperson# | If a number is entered into this field, then the user is restricted to records related only to the corresponding salesperson. A record is considered to be related to a salesperson if the record itself or its related Billto file record contains that salesperson's number or related salesperson listed in the Salesperson Relationship File. |
For detailed information on all the settings, refer to the Navigator Menu (Menu option NAV)
RADAR Web Access (Option W)
Enable or disable a user's access to the Kerridge web applications.
Use the Navigator Authority Class field to assign the user to an established authority class. Authority Classes are created via option NAV 2 - Work w/ Authority Classes.
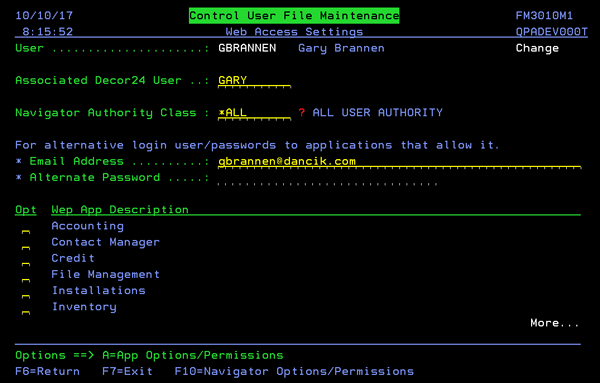
Use the A=App Options/Parameters option to specify the access level for the features. These settings are established in the same manner as the global settings so for more detailed information refer to Work with Global App Defaults.
The Associated Decor24 User setting provides the ability to move between the RADAR, Navigator., and Decor 24 applications without having to re-enter a user name and password; multiple times.
- Enter the user's associated Decor 24 name
- If the Decor 24 user name is valid and active, the Access Decor 24 button appears on the RADAR entry screen.
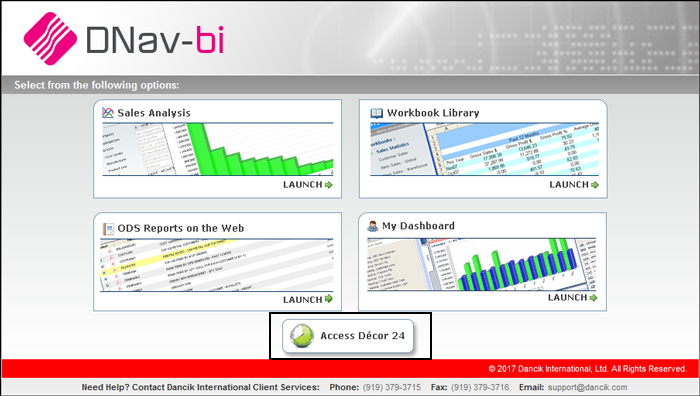
For more information on moving between RADAR, Decor 24 and Navigator, click here.
RADAR Web Control Panel (Option Y)
These settings are the same settings that establish operator defaults and restrictions based on the users work station ID. The difference is that these settings relate to a user ID instead of a workstation, and only affect the users use of Kerridge's web based applications. Essentially these settings enable user-based web applications to use restrictions and settings normally associated with a work station.
The settings most associated with RADAR are circled.
